Differences Between Tree Pruning vs Cutting or Trimming

tree pruning vs cutting

Tree pruning vs cutting. What’s the difference between them? Pruning involves selectively removing branches to improve a tree’s health. Read on to learn more.

Trees are living things, and just like people, they need proper care to stay healthy.

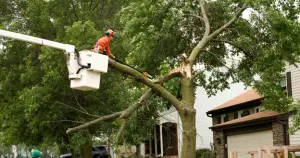
One way Tree Surgeons Cork City care for trees is through pruning, cutting, and trimming.

While tree pruning vs cutting, and trimming are often used like they mean the same thing, they actually have different purposes and are done at different times.

Tree trimming and pruning both help your trees look neat and stay healthy.

Trimming usually focuses on shaping and improving the look, while pruning often targets the health of the tree by removing certain branches.

Tree cutting can sometimes help a tree’s health, but it’s also done when a tree needs to be removed or reduced for safety.

Every tree has its own needs based on its age, type, and environment.

Knowing the difference between these services can help you choose the right tree care and keep your garden looking its best.

So, we’re going to be looking at the differences in this article.

Tree Trimming

Basically, trimming involves getting rid of overgrown branches from crops, like trees, shrubs, and hedges.

But within the context of our discussion, tree trimming only relates to trees.

Excess growth prevents sunlight from getting to most parts of the tree, which later affects growth.

They also stop extra branches from retrieving nutrients and moisture.

Trimming ensures overall health for the tree.

Trimming also preserves the shape of the tree. However, most people use trimming to improve the aesthetics of the tree.

Branches overgrow when trees are not taken care of, and this affects the tree’s shape. That’s why you can see them with a messy and unbalanced shape.

If you want a healthy-trimmed tree, you should look out for tree surgery services.

However, don’t just stop at trimming. It’s Important to know what is going on under the bark and below the floor.

You can get a free consultation from an ISA Certified Arborist for a check and help create a long-term plan.

Due to the high-level training certified arborists undergo, they are skilled in detecting any sign of illness, pests, and environmental stressors.

A tree’s growth can be slowed down by things like grass competing for nutrients, water not draining well, being too close to buildings or other structures, and poor soil quality.

tree pruning vs cutting

Tree Pruning

Tree pruning involves removing branches that are sick, dead, or damaged. This helps protect the rest of the tree, as well as nearby plants, from harm.

Cutting away unhealthy parts helps you stop diseases from spreading and gives the tree a better chance to grow strong and healthy.

Most trees should be pruned once a year, usually after their blooming season. This keeps them healthy and helps them develop properly.

The safest way to do this is by hiring an arborist. They can diagnose problems early and prevent future issues.

Pruning helps a tree look better by improving its shape, but its main goal is to protect the tree’s health.

Pruning also reduce pest problems, since pests often target dead or weak branches.

Arborists have the skills and experience to provide excellent tree surgery services.

An untrained person might remove the wrong branches, which can harm the tree’s future growth.

So, let the professional tree pruning services handle the pruning so your garden or yard stays healthy and beautiful.

Tree Cutting

You’ll need to cut down your tree if it’s dead, diseased, or overgrown. Or maybe you may have planted it in the wrong place.

It’s not advisable to cut your tree by yourself because it can be risky if you’re not trained for it.

It’s much safer to hire professional services to do the work for you.

Tree arborists can detect the condition of the tree, so that the disease will not spread to other trees.

This will avoid being in a situation where cutting the tree is the last option.

Before cutting the tree, all regulations must be checked so that your area’s permits and approvals are complied with.

Cutting your tree might look like you’re saving a lot of money, but it isn’t the safest choice.

You should also avoid cutting any trees if you are in any way harmed, tired, or physically unfit.

Professional services will make things easier for you.

tree pruning vs cutting

Which Equipment is Used?

Tree pruning usually involves using equipment like hand shears and lopping shears.

Hand shears are small and can be used with one hand, making them perfect for cutting leaves or buds.

Lopping shears have long handles and are better for cutting thicker branches. If a branch is too thick, a saw is the better choice.

Shears can also be used for tree trimming, but they aren’t strong enough for hedge branches.

For trimming hedges, the best equipment is a gas-powered or electric hedge trimmer, which makes the job faster and easier.

When is the Right Time to Care for Your Tree?

Usually, the standard for conducting tree trimming services is twice a year. At the same time, you should do tree pruning at least once a year.

But the tree species determines the kind of tree service to be done.

For example, pruning should be done for flowering trees after the blooming cycle.

The best seasons for pruning trees like summer-flowering trees are Winter and Spring.

The flowering season is the best time to cut your tree and shrubs, or hedges, for beauty.

Find certified arborist tree services that will offer useful guidance concerning the best time for tree cutting, tree trimming, and tree pruning.

If you just want to trim or prune your tree mainly for aesthetics, your preference and appearance will determine the time to do it.

If you don’t like the way your trees are looking, you can call tree trimming and removal services.

Conclusion

If you would like to know more about tree pruning vs cutting or trimming, certified arborist tree services can handle it for you.

Working with professionals guarantees that your trees are in the best possible health for the best growth.

This is because they use sustainable tree care techniques, equipment, and products.

If you are worried about getting hurt, find any tree surgery services that are fully insured.

This way, they can protect you from any kind of risk in case anyone gets hurt or anything gets damaged.

 …

5 Benefits of a Home RV Repair

home rv repair

“Learn more about the benefits of a home RV repair and how one can save you from a lot of stress, give you peace, and cut down on cost, time, and effort.”

home rv repair

According to a report from the RV Industry Association, around 11.2 million households own an RV, representing a 62% increase from 2001 and a 26% increase from 2011. The RV industry is experiencing growth, with a large number of households expressing interest in purchasing an RV in the future. 

To further illustrate my point, approximately 30% of RVs experience a major mechanical breakdown by their third year on the road, and this number increases to 80% by year five. This highlights the inevitability of repairs, particularly for full-time RVers, and emphasizes the importance of budgeting for and anticipating these costs.

Now, you would agree with me that the great demand for RVs also comes with a higher demand for quality home RV repair and RV repair near me searches. If there’s one repair service you’ll surely need, it’s mobile RV repair services.

In this post, we will explain what a home RV repair is and the five key benefits of a home RV repair, and why it is better than the regular RV repair services you have probably utilized before. Let’s get into it.

What is a Home RV Repair?

home rv repair

In simple terms, a mobile RV repair service is a type of repair service that meets you where you are.

It is the maintenance, troubleshooting, and fixing of issues with recreational vehicles, often done at the owner’s residence or campsite rather than at a dedicated repair shop. This can involve various aspects of the RV, including mechanical, electrical, plumbing, and structural components. 

In certain situations, people choose home repair services out of necessity because they are unable to move the RV due to damage. However, most of the time, a mobile RV mechanic is hired because it is the most convenient option.

Common Home RV Repairs may include:

  • Engine Issues: Addressing engine problems, including starting issues, overheating, and performance problems. 
  • Tire Blowouts: Repairing or replacing damaged tires. 
  • Plumbing Leaks: Fixing leaks in water lines, faucets, and other plumbing fixtures. 
  • Appliance Malfunctions: Repairing or replacing malfunctioning appliances. 
  • Electrical Problems: Troubleshooting and repairing electrical wiring, outlets, and other components. 
  • Roof Leaks: Identifying and repairing leaks in the RV roof. 
  • Slide-Out and Awning Issues: Repairing or replacing components of the slide-out or awning. 
  • Exterior Damage: Repairing or replacing damaged panels, windows, or other exterior components. 

Mobile RV repair services are just like the services you get from your usual RV repair shops. The only difference is that a mobile RV repair service travels to where you are and handles the problem right then and there. You don’t need to bring your vehicle to a service shop.

Benefits of a Home RV Repair

home rv repair

Managing maintenance and repairs is a common responsibility for RV owners. Although you can arrange for regular maintenance and inspections of your RV, repairs are quite different.

I mean, malfunctions and accidents are unpredictable, so it is necessary to be prepared for such situations, and mobile RV repair services are available to assist with unforeseen issues that may arise with your RVs.

Let’s look at some of these benefits.

Convenience

The primary reason to rely on mobile RV repairs is that it’s incredibly convenient.

You don’t have to tow your RV to a shop, which can be a hassle, especially if the issue is significant or you’re far from a repair facility. Mobile RV repair services come to you, whether you’re at home, a campground, or even on the side of the road.

The convenience of mobile RV repair services is one of its most sought-after advantages. This service allows you to avoid the inconvenience of waiting for your repair appointment, which might take days or even weeks to arrive. Also, you won’t need to deal with the issue of towing a broken RV to the RV dealership and dealing with traffic, which can be pretty annoying, particularly during rush hours.

Time Savings

On-site repairs can be done much faster than waiting for an appointment at a shop and then having the work completed. This gets you back on the road sooner, especially important during a trip. 

Home RV repair, or mobile RV repair services, can significantly save time compared to taking an RV to a shop. This is because mobile technicians come to your location, eliminating travel time and the need to schedule appointments at a repair facility. This allows for quicker repairs and less downtime, getting you back on the road faster.

Cost-Effectiveness

While it may seem counterintuitive, mobile repairs can sometimes be more cost-effective. They eliminate towing costs, allowing the mobile technician to focus solely on your RV, which can potentially lead to quicker diagnosis and repair.

Using mobile services for RV issues is more economical than taking it to a repair shop. While the cost of repairing your RV might be similar or even less at a shop due to the technician’s travel costs to your location, you save on fuel, time, and other expenses. Also, if your RV requires towing, the expenses for driving and towing can be substantial.

Personalized Attention

Working with a mobile technician means you get one-on-one attention, and they can address your specific concerns without the distractions of a busy shop environment. 

Personalized attention is a key benefit of home RV repair services. Unlike crowded repair shops, mobile RV repair technicians offer a one-on-one experience, enabling tailored solutions and a deeper understanding of your RV’s specific needs. This focused approach can lead to more effective repairs and preventative measures, ensuring your RV is well-maintained and ready for your next adventure. 

Preventative Maintenance

Mobile RV repair services often offer preventative maintenance checks, helping you identify and address potential issues before they become major problems, saving you time and money in the long run. 

Preventive maintenance in RVs offers significant benefits, including reduced repair costs, increased lifespan, and enhanced safety during travel. By proactively addressing potential issues through regular inspections and maintenance, RV owners can avoid costly breakdowns, extend the life of their vehicles, and enjoy a more reliable and safer travel experience. 

Expertise

Mobile RV repair services often specialize in RVs, meaning the technicians have in-depth knowledge and experience with the unique systems and components found in recreational vehicles. 

Expertise is a crucial benefit of using a professional RV repair service, whether it’s at a shop or through mobile repair. Experienced technicians, especially those with certifications, have the knowledge and skills to diagnose and fix a wide range of issues efficiently and accurately, potentially saving time, money, and preventing further damage. 

Conclusion

home rv repair

Clearly, the option to hire a mobile RV repair service is an awesome one.

Before you go on that exciting adventure you’ve been planning for months, it’s wise to be ready and have a list of RV repair shops near your travel route. Or, reaching out to a reliable mobile RV repair company that can help you out when problems arise, especially when you’re on the road.

If you’re in the Central Coast, you can get in touch with us at The Mobile RV Repair Company, and they will get your problems fixed stress-free. With professional and expert technicians, you can rest assured that your RV will get the best service so that you can get back on the road as soon as possible!

Will Cockroach Spray Kill Bed Bugs?

will cockroach spray kill bed bugs

Will cockroach spray kill bed bugs? Find out if using roach spray is a real solution or just a waste of time when you’re dealing with a bed bug problem.

It’s hard to sleep when you know bed bugs might be crawling around.

You spot bites. You flip your mattress. You start to panic.

 And then you look under your sink and spot a can of cockroach spray.

A thought pops up — “Will cockroach spray kill bed bugs?”

There are a lot of questions like this asked when they’re dealing with an itchy, stressful problem like this.

Let’s dive into what works, what doesn’t, and what you can really do to get your home back to normal.

Let’s Talk About Bed Bugs

Before we even talk about sprays, Let’s know what these bugs are;

Bed bugs are:

  • They are very tiny
  • Flat and reddish-brown.
  • They are primarily active at night (they love feeding while you’re asleep).
  • They are hard to find because they hide in cracks, mattresses, and behind picture frames.

They don’t carry diseases, but they do leave itchy bites and cause severe stress.

So, Will Cockroach Spray Kill Bed Bugs?

The answer is obvious: it cannot.

Manufacturers make cockroach sprays to kill cockroaches. It might kill a bed bug if you spray it directly, but that’s not enough.

Bed bugs don’t hang out like roaches do. They are hiding and lay eggs in places you can’t see. And they spread fast.

Cockroach spray might help you kill one or two, but it won’t fix the whole problem.

Bed bugs need specific kinds of treatments. Even then, it usually takes more than one try.

So, cockroach spray is not a good way to kill bed bugs. You need something more substantial and more targeted.

What Makes Bed Bugs So Hard to Kill?

They are super and naturally stubborn to kill. Here is why:

  • They’re great at hiding. They squeeze into the most minor cracks and only come out when you’re asleep.
  • They lay lots of eggs. Even if you kill the adults, new ones can hatch days later.
  • They’ve gotten used to some sprays. Over time, bed bugs have built up resistance to specific chemical treatments.

So, just spraying around with cockroach spray won’t work.

It might feel like you’re doing something helpful, but you’re really just wasting time and maybe even making it worse.

will cockroach spray kill bed bugs

What Should Be Done Instead

If you have bed bugs, this isn’t something to ignore. You don’t want it getting out of hand.

Here’s what works better than cockroach spray:

  1. Wash and dry everything. Use hot water and a hot dryer. Bed bugs can’t survive high heat.
  2. Vacuum like crazy. Go over your mattress, couch, baseboards — anywhere they might be hiding. Then, toss out the vacuum bag right away.
  3. Use bed bug sprays, not cockroach ones. Look for ones explicitly labeled for bed bugs.
  4. Cover your mattress. Use a bed bug-proof cover. That traps any bugs inside and keeps new ones out.
  5. Call a Pest Control Company. Seriously, this is your best move if things get bad.

When It’s Time to Call the Pros

Sometimes, you do not want to make that call because you feel you can handle it, but you haven’t. You can do everything right, but bugs are still showing up.

If you’re in Canada, there’s a great pest control company in Edmonton that can help: Professional Pest Management. They’ve dealt with this stuff for years and actually know how to solve it.

Getting help isn’t giving up. It’s taking your home back.

Why Cockroach Treatments Are Different

Let’s go back for a second and talk about why Cockroach Treatments don’t work on bed bugs. It comes down to how each pest lives.

  • Cockroaches come out in the open. Bed bugs don’t.
  • Cockroach sprays are more general. Bed bugs need targeted stuff.
  • The chemicals are different. Bed bugs need products that get into where they hide.

So, using cockroach spray is kind of like using a spoon to try and hammer in a nail. It’s just not made for the job.

Why This All Feels So Overwhelming

Let’s be honest. When you’re dealing with bed bugs, it’s not just about the bugs. It messes with your head.

You don’t sleep well. You feel gross. You feel like your home isn’t really yours anymore.

It’s not your fault, and bed bugs don’t mean you’re dirty.

They don’t mean you did something wrong. They’re just pests.

Tough ones, sure, but still just bugs.

will cockroach spray kill bed bugs

What You Can Do Right Now

Here’s a simple plan you can follow today:

  • Check your mattress and sheets for little blood stains or black dots. That’s usually a sign.
  • Wash your bedsheet and bedding with hot water.
  • Vacuum daily around your bed and baseboards.
  • Buy a bed bug spray, not cockroach spray. Look at reviews first.
  • Use a bed encasement to trap any that are still inside.
  • Reach out to a Pest Control Company if things don’t improve in a week or two.

Try following these steps and be free from bed bugs.

Other Pests Bugging You?

If you’re also seeing signs of other pests, like mice or roaches, that’s something to handle, too.

Mice Control is another issue that can affect your home’s cleanliness and safety. If you hear scratching in the walls or see droppings, don’t wait.

 Mice carry germs and can chew through wires.

Getting a full check from a pro might help spot other problems early — before they get worse.

For trusted advice, The U.S. Environmental Protection Agency has a guide on how to deal with bed bugs safely: EPA Bed Bug Info.

Also, the Centers for Disease Control and Prevention has a solid page that talks about health effects and how to avoid infestations: CDC on Bed Bugs.

Conclusion

Dealing with bed bugs can be really tiring. It’s gross, it’s stressful, and it feels like it’ll never end.

You want quick answers. You want one spray to fix everything. But unfortunately, cockroach spray isn’t the answer.

And, if you’ve already tried cockroach spray? That’s okay. You were trying to fix it fast—no shame in that.

But now you know better. And now you can do better.

Take action today. Do the simple steps. And if you need help, don’t wait too long to get it.…

True Cost of Replacement Windows and Doors in 2025

cost of replacement windows and doors

If you’re thinking about new windows or doors, this guide breaks down the cost of replacement windows and doors in 2025 in plain, simple terms.

Let’s be real for a sec—nobody really wants to think about spending money on windows or doors.

But when the cold air starts sneaking in, or your door starts sticking like it’s holding a grudge, it’s time to deal with it.

I’ve been there, too, trying to Google the cost of replacement windows and doors while hoping my old ones hold on for just one more winter.

If that sounds like you, keep reading. I’ll walk you through everything you need to know and what it’ll actually cost you.

Why People Replace Windows and Doors in the First Place

Before we even talk money, let’s talk why. Because nobody replaces something that’s working fine, right?

Here’s why most people start looking into windows and doors:

  • They’re drafty. If you feel a breeze inside with all windows shut, that’s a red flag.
  • They’re old and breaking down. Wood rots. Seals crack. Glass fogs. It happens.
  • Energy bills are climbing. Poor windows and doors let air leak, so your heater or AC works overtime.
  • Looks matter. Sometimes, it’s just time for a refresh, especially if you’re trying to sell.

And I get it—money’s tight for a lot of folks right now. But some things just can’t wait forever.

What Affects the Cost of Replacement Windows and Doors

Now, let’s get to the part no one likes—the cost. It’s not the same for everyone, but here’s what can make your price go up or down:

  • How many you’re replacing. Replacing one window is cheaper than ten. Obvious, right?
  • Size and type. A basic window is cheaper than a bay or bow window. Same goes for doors—solid wood costs more than steel or fiberglass.
  • Installation fees. Labor costs vary by area and company. Some charge per window. Others charge by the hour.
  • Custom work. Odd-shaped windows? Fancy glass? Expect to pay more.
  • Location. If you live in a city like Markham, local costs and availability can also shift the price a bit.

How Much Does It Really Cost in 2025?

Okay, real numbers. I won’t dance around it.

  • Basic vinyl window replacement: $300–$850 each
  • Energy-efficient or triple-pane windows: $600–$1,200 each
  • Bay or bow windows: $1,200–$3,000 or more
  • Exterior door replacement: $600–$2,500, depending on the material
  • Installation costs: Usually $100–$300 per window, and $150–$800 per door

So, if you’re replacing windows and doors in a regular-sized house, you’re likely looking at $8,000–$15,000 total.

And yeah, that’s a chunk of change. I know.

I actually delayed replacing mine for two years before finally doing it, and let me tell you—my heating bill finally stopped giving me mini heart attacks.

Let’s Talk About Doors for a Minute

Doors don’t always get the same love as windows, but they matter just as much.

A cheap or broken door can cause heat loss, safety issues, or even leaks during storms.

When it comes to door replacement, one of the best companies I came across was Panorama Windows and Doors.

They’re based in Markham and honestly, their work speaks for itself.

Types of doors that impact the price:

  • Steel doors: Durable and on the cheaper side
  • Fiberglass doors: Mid-range in price, good insulation
  • Wood doors: Gorgeous, but expensive and need more care

So, depending on what you choose, a front door replacement costs anywhere from $600 to $2,500, sometimes even more if you want glass panels or smart locks added in.

How to Tell If You Actually Need to Replace Them

cost of replacement windows and doors

Now, before you go spending all that money, make sure replacement is the right move.

Sometimes, you just need a quick fix or new seals.

But here are signs you really do need windows replacement or new doors:

  • You hear everything from outside, even when it’s shut.
  • You have trouble opening or closing them.
  • Condensation or fog between window panes.
  • Cold drafts in winter or heat coming in during summer.
  • Cracked frames or broken locks.

If that sounds familiar, waiting will just cost you more in energy bills (and stress).

Choose the Right Windows Company

Don’t just go with the first one you Google. I made that mistake once.

Ended up with a crew that didn’t finish the job right, and I had to pay someone else to fix it. Learn from me.

Here’s what to look for in a windows company:

  • Local experience. They should know the weather, permits, and housing styles in your area.
  • Clear pricing. If the quote feels vague or too good to be true, run.
  • Warranty. Make sure both the product and the installation are covered.
  • Good reviews. Check third-party sites like HomeStars or Better Business Bureau.
  • No pressure sales. A solid company won’t push you into something you’re not ready for.

Especially if you’re in windows Markham area, take your time. You’ve got options.

Tips to Make the Most of Your Budget

I know, all these numbers might feel overwhelming. But you’ve got options to cut costs without cutting corners.

Here are a few smart moves:

  1. Replace in phases. Start with the worst ones first.
  2. Ask about off-season deals. Winter or late fall installs can be cheaper.
  3. Choose energy-efficient windows. They might cost more upfront but save money over time.
  4. Stick with local pros. If you’re searching windows near me, choose someone with good reviews and who’s been around a while.
  5. Don’t cheap out on installation. A good product installed wrong won’t help you.

Conclusion on Cost of Replacement Windows and Doors

Listen, I won’t lie—the cost of replacement windows and doors isn’t pocket change.

It can feel like a punch in the gut when you first see the quote.

I’ve been there, staring at a bill and thinking, “Why is this so dang expensive?”

But here’s what I’ll say—once it’s done, you’ll feel the difference.

Your home will be quieter, warmer, and honestly? It just feels better when things work the way they should.

If you’ve been putting it off like I did, I get it. It’s a big step. But if your energy bill is climbing, or your doors are hanging by a thread, it might be time.

Don’t wait until it gets worse and more expensive.

Start small if you have to. Get quotes, ask around, and take your time picking the right windows company.

And remember, there’s no shame in saying, “I can’t afford this all at once.” Just make a plan and chip away at it.

You’ve got this.…

What Will Replace Caesarstone Kitchen Benchtops

what will replace caesarstone kitchen benchtops

If you’re asking what will replace Caesarstone kitchen benchtops, this guide breaks it down in simple terms and shares smart, affordable options that make sense.

Okay, so you’ve probably been hearing a lot about Caesarstone.

It used to be the go-to for kitchen benchtops, right? Clean look, tough surface, and a brand name that made you feel like you were choosing something top-tier.

But now… not so much.

A lot of people, maybe even you, are asking: What will replace Caesarstone kitchen benchtops?”

That’s not just a design question. It’s a real-life problem when your benchtop cracks, stains, or just doesn’t feel worth the money anymore.

So, in this post, I’m breaking down real options that actually make sense.

We’re not just talking pretty kitchens. We’re talking about smart, solid choices for real homes.

Let’s get into it.

Why People Are Moving Away From Caesarstone

Before we talk about what to use instead, let’s be honest about why folks are stepping away from Caesarstone in the first place.

Here’s what I’ve been hearing and even seen for myself:

  • Cracking problems – Especially around the sink or cooktop. That’s the last place you want something breaking.
  • Too pricey – You’re paying a premium price, but the product sometimes just doesn’t hold up over time.
  • Limited repair options – If it chips or breaks, fixing it can be more headache than it’s worth.
  • Not as heat resistant as people think – You place a hot pot down? You might be in trouble.

And look, I’m not here to knock a brand.

But if something’s not doing its job, it’s fair to ask: “What else is out there that actually works?”

What Are Better Options Than Caesarstone?

Let’s talk about what will replace Caesarstone kitchen benchtops. Here are a few materials that people are leaning toward these days.

I’ll keep it real and break it down simple:

1. Porcelain Benchtops

Pros:

  • Super strong
  • Handles heat well
  • Doesn’t stain easily
  • Looks really nice (lots of design options)

Cons:

  • Costs about the same as Caesarstone, maybe more
  • You need a pro to install it right

Still, it’s solid and long-lasting. You might spend more upfront, but it doesn’t crack or chip like Caesarstone sometimes does.

2. Laminate Benchtops

This one surprised me. Laminate has come a long way.

Pros:

  • Way more affordable
  • So many patterns now (stone look, wood grain, etc.)
  • Easy to clean
  • Good for rental homes or short-term use

Cons:

  • Can scratch
  • Not heat resistant
  • Doesn’t add as much value to your home if you’re thinking resale

Still, it’s a decent pick for folks who want something that looks good without blowing the budget.

3. Timber (Wood) Benchtops

Some people are going back to the old-school wood look — and it’s honestly kinda charming.

Pros:

  • Warm, natural vibe
  • Looks great with white cabinets
  • Can be sanded and re-oiled over time

Cons:

  • Needs regular upkeep
  • Can stain or burn if you’re not careful

This is one of those options that works best if you’re okay with a little extra care.

4. Stainless Steel Benchtops

Now, this one’s mostly for people who want that “chef’s kitchen” style.

Pros:

  • Super durable
  • Easy to clean
  • Heat and water-resistant

Cons:

  • Scratches easily
  • Feels a bit “cold” for home kitchens
  • Can be loud

If you like modern kitchens, this could work. But it’s not for everyone.

My Honest Take on What Makes Sense Today

what will replace caesarstone kitchen benchtops

If you asked me what I’d personally pick to replace Caesarstone, I’d go with porcelain or high-end laminate.

Here’s why:

  • Porcelain gives you that stone look with better performance. It’s tough and handles heat better.
  • Laminate gives you budget control. If you’re fixing up a home to rent or sell, this one makes sense.

And if you’re in New Zealand and looking for kitchen benchtops, I’d recommend checking out Kitchens NZ.
They’ve got different benchtop styles and can help you match something to your kitchen without guessing your way through it.

Trends I’ve Noticed Lately in Kitchen Benchtops

Let’s keep it simple: people are not just looking for “pretty.” They want:

  • Surfaces that last
  • Easy-to-clean materials
  • Better value for money
  • Something that matches their everyday kitchen use (not just showroom kitchens)

You know what else I’ve noticed?

A lot more people are talking about loving my kitchen benchtop when they’ve had a good experience getting something custom-done.

It’s not always about brands — it’s about the service and whether you’re being sold something useful or just expensive.

Key Things to Ask Before Choosing a New Benchtop

You don’t have to be a kitchen expert to figure this stuff out. But before you pick something to replace Caesarstone, ask yourself:

  • Do I cook a lot or not much?
    If your kitchen is just for coffee and takeout, you might not need to spend big.
  • Am I staying in this house long-term?
    Long-term = invest more. Short-term = go practical.
  • Do I want low maintenance or am I okay with upkeep?
    Wood looks great but needs love. Porcelain or stainless? Wipe and go.
  • Do I care about trends or just want it to work?
    Some people want marble look, others just want a tough benchtop that doesn’t crack.

Write your answers down. It’ll help you feel clear and not get talked into something you don’t need.

What About Environmental Stuff?

Fair question. These days, more people are thinking about the earth, too.

Materials like recycled timber or bamboo are becoming popular. Some new benchtops are made with recycled stone pieces or eco-resin.

You’ll want to check if the manufacturer has any info on how green their product is.

The Green Building Council NZ is a good place to read more on this kind of stuff.

The Real Cost (Money + Time + Stress)

what will replace caesarstone kitchen benchtops

It’s not just the price of the slab. You also need to think about:

  • Cutting and fitting
  • Transport costs
  • Installation time
  • Downtime in your kitchen (you’ll probably be using the microwave for a week or two)

And don’t forget… cheap materials can cost more later if they break or don’t last.

A few dollars saved now could turn into a headache 6 months later. I’ve been there.

I once chose a cheaper laminate option for a rental. It peeled after 1 year.

I had to replace it, and guess what? I ended up paying more than if I’d just done it right the first time.

Conclusion: What Will Replace Caesarstone Kitchen Benchtops

Let me be real with you.

There’s no “one-size-fits-all” answer.

But if you’ve been asking what will replace Caesarstone kitchen benchtops, now you’ve got options — real ones.

Here’s a quick recap:

  • Go with porcelain if you want long-term quality and don’t mind paying a bit more.
  • Try laminate if you’re on a tight budget or fixing up a short-term space.
  • Woodworks if you love that warm, natural style and can handle some upkeep.
  • Stainless steel is great if you’re always cooking and want something super clean.
  • And don’t forget to check out Kitchens NZ if you’re in New Zealand and want help choosing something that actually fits your kitchen and life.

You deserve a kitchen that works for you — not just something that looks good on a brochure.

What Is a Leak Detection Test? How It Works and When You Need One

what-is-a-leak-detection-test

What is a leak detection test? Learn how it works, when to get one, and why it’s key to preventing costly water damage in your home or business.

You walk into your kitchen and notice the floor feels damp.

Or maybe your water bill just spiked out of nowhere.

You can’t see any dripping faucets or burst pipes, but something’s definitely wrong.

That’s when a leak detection test can save you from turning a small issue into a full-blown disaster.

But what exactly is a leak detection test, how does it work, and when should you actually get one?

Let’s break it down clearly and simply—no jargon, just straight answers and real-world advice.

What Is a Leak Detection Test?

A leak detection test is a process used by plumbers to find hidden water leaks inside your plumbing system (behind walls, underground, under slabs, or in ceilings) without tearing your place apart.

This test uses special equipment to pinpoint leaks quickly and accurately, helping homeowners and business owners avoid unnecessary damage or inflated water bills.

Leak detection isn’t guesswork. It’s science mixed with experience and the right tools.

Why Water Leaks Are So Dangerous

Not all leaks show up as puddles on the floor.

Some are silent, slow, and steady, and those are the ones that cause the most damage over time.

Here’s what can happen if you ignore a hidden leak:

  • Mold and mildew start to grow inside walls, posing health risks.
  • Structural damage weakens floors, beams, or foundations.
  • Sky-high utility bills drain your budget monthly.
  • Water stains ruin drywall, paint, and floors.
  • Insurance claims may be denied if you can’t prove regular maintenance.

In short, a simple leak, if left unchecked, can wreck your property and cost thousands in repairs.

How Does a Leak Detection Test Work?

Professional plumbers use advanced, non-invasive tools to detect leaks without knocking down walls or digging up your entire yard.

Here are the most common methods:

1. Acoustic Listening Devices

These tools increase the sound of water escaping from pipes.

Trained technicians can “listen” through floors or walls and detect where the leak is coming from.

2. Thermal Imaging Cameras

Infrared technology spots changes in surface temperature caused by moisture. It’s perfect for finding leaks in heated floors, ceilings, or behind walls.

what is a leak detection test

3. Moisture Meters

These handheld devices measure moisture levels in wood, drywall, or concrete. They help determine how far the water has spread.

4. Pressure Testing

By sealing off part of the plumbing and pressurizing it, plumbers can identify pressure drops (an early sign of a leak).

5. Tracer Gas Detection

In complex or underground setups, a non-toxic gas is pumped into the pipes.

Special sensors then track where it escapes, showing the exact location of a leak.

Each method is used based on the situation. Skilled plumbers know how to combine tools and observations to get accurate results without invasive guesswork.

Signs You Might Need a Leak Detection Test

You don’t need to wait for water to pour through the ceiling.

These are some subtle warning signs that it’s time to call in the pros:

  1. Unexplained jump in water bills
  2. Low water pressure in sinks, showers, or toilets
  3. Musty odors in specific rooms
  4. Cracks in walls or floors
  5. Visible water damage with no clear source
  6. Constantly running water meter when all taps are off
  7. Sounds of water running when everything’s turned off

Even if you’re unsure, it’s better to get a professional opinion before things escalate.

Where Leaks Commonly Hide

Plumbing leaks can occur in places that are totally out of sight:

  • Behind walls
  • Under floors
  • Underneath concrete slabs (slab leaks)
  • Inside ceilings
  • Underground pipes in your yard
  • Around toilets, bathtubs, or showers
  • Irrigation systems

Many Vancouver homeowners have no idea there’s a problem until it’s too late.

How Much Does a Leak Detection Test Cost?

Prices can vary depending on:

  • The size of your home or property
  • The location and type of leak
  • The technology needed to detect it

On average, a leak detection test in Vancouver may cost between $150 to $500.

The good news? Early detection often prevents thousands of dollars in repairs later. Think of it as an investment in your home’s safety and value.

Can You Do a Leak Detection Test Yourself?

Sure, you can try basic DIY tests like checking your water meter or looking for damp spots. But these methods are limited.

DIY tips include:

  • Turn off all water sources and watch the meter
  • Listen for dripping or hissing sounds
  • Place paper towels around suspicious areas

But if you suspect a hidden leak, it’s time to call in a pro.

Trying to chase a leak without the right tools can waste time and money or cause more damage.

Why Timing Is Everything

The longer you wait, the worse a leak can get.

Water seeps quietly and spreads quickly.

A drip today can become a full-on flood next month. Mold can take hold in as little as 24-48 hours.

And your insurance provider? They might not cover the damage if they believe you waited too long to act.

The best time to book a leak detection test? As soon as something seems off.

Who Should You Call for Leak Detection in Vancouver?

If you’re in the Vancouver area and suspect a leak, you need a trusted expert.

You need someone who responds quickly, uses modern tools, and doesn’t make you wait weeks for service.

That’s where Pacific Blue Mechanical & Plumbing comes in.

With a strong reputation for fast, accurate, and affordable service, they’re the go-to team for leak detection in Vancouver.

Whether it’s a hidden pipe leak, a slab issue, or ongoing water pressure problems, they’ve seen it all, and fixed it all.

They combine technical skill with top-tier customer service, showing up when they say they will and walking you through every step.

No hidden fees, no upsells—just honest, professional help.

what is a leak detection test

Final Thoughts: Don’t Wait Until It’s Too Late

Hidden leaks don’t fix themselves.

If you’ve noticed higher water bills, odd smells, or mysterious damp spots—don’t ignore the signs.

A leak detection test could uncover the issue before it turns into major damage.

When in doubt, get it checked out.

And if you’re in BC, don’t hesitate to reach out to the team at Pacific Blue Mechanical & Plumbing. They’re the trusted name when it comes to Leak Detection Vancouver residents can count on.

Ready to stop guessing and start solving?

Call a licensed plumber, schedule a test, and keep your home dry, safe, and stress-free.…

Top Interior Painting Questions Homeowners Ask

interior painting questions

Here are the most common interior painting questions people ask before starting a project. Simple tips to help you make better painting decisions.

Thinking about painting your house? I get it.

Choosing colors, finding the right contractor, and ensuring it’s all worth the money is a lot.

But the truth is most people have the same interior painting questions running through their heads.

I’ve been there too. You stare at the walls, not sure where to begin.

Do you go with white? Grey? Do you paint one room or the whole house? What if it peels?

So, in this post, I’ll walk you through the top interior painting questions people usually ask.

I’ll answer them PLAINLY, just like I would if we were chatting in your kitchen over coffee.

Let’s begin.

1. What Should I Do Before I Paint My Walls?

Good question. Before you start, there are a few simple things you should do:

  • Move your furniture out of the way or cover it with plastic.
  • Clean the walls so the paint sticks better.
  • Cover up holes or cracks with spackling paste.
  • Use painter’s tape on baseboards and around windows.

You don’t need to be a pro to do these steps. But skipping them can mess up your final results.

2. Do I Really Need Primer?

Yes, in most cases. Here’s when primer helps:

  • If your walls are stained or super dirty
  • If you’re going from dark to light paint
  • If the walls haven’t been painted in years

Primer makes the final color look smoother and more even. It also helps paint stick better and last longer.

So yes, use it unless the paint you buy says it includes primer.

3. How Do I Choose the Right Paint Color?

This is one of the most common interior painting questions. Choosing a paint color feels easy until you’re standing in front of 300 tiny swatches.

Here’s how I decide:

  • Start small. Paint a little area on the wall first and live with it for a few days.
  • Think about lighting. Paint can look different in natural light vs. lamps.
  • Stick with neutrals if you’re not sure—like soft gray, white, or beige.

If you’re still stuck, look at pictures online or ask a contractor for help.

4. How Long Does Interior Painting Take?

For a standard room, it usually takes:

  • 1 day to prep
  • 1 day to paint

But that can change depending on the room size, paint type, and how many coats you need.

Some projects, like a full bathroom remodel, may take longer—especially if you’re working with a bathroom contractor NJ or a bathroom contractor NY who’s also doing other updates.

If you’re hiring a pro, ask them how long they’ll need. Most are happy to give a timeline.

5. Should I Paint Myself or Hire a Contractor?

interior painting questions

If you’re asking this, you’re not alone. Lots of homeowners wonder if they should do a DIY or call in help.

Here’s what to think about:

Do it yourself if:

  • You have time
  • You’re only painting a small space
  • You’re okay with minor mistakes

Hire a contractor if:

  • You want a fast and clean job
  • You’re painting your whole house
  • You’ve got tricky areas like ceilings or cabinets

And if you’re already planning a bathroom remodel, hiring a bathroom contractor who also does painting can save time.

6. What’s the Difference Between Cheap and Expensive Paint?

It comes down to two things: coverage and durability.

Cheap paint usually needs more coats and might peel faster. Good paint gives better coverage in one or two coats, saves time, and lasts longer.

So even if the good stuff costs more, it can save you money in the long run.

7. How Do I Fix Peeling or Cracked Paint?

This one’s common, especially in older homes. If your paint is peeling or cracking:

  • Scrape off the old paint
  • Sand the area smooth
  • Apply primer
  • Repaint

Peeling can also be a sign of moistness.

It might be better to look into bathroom reglazing or a proper bathroom remodel in places like bathrooms—especially if there’s water damage.

8. What’s the Best Time of Year to Paint?

For indoor painting, any time works. But here’s what helps:

  • Mild temperatures (not too hot or cold)
  • Low humidity to help paint dry faster
  • Good air flow (open windows or use fans)

Spring and fall are great, but you can paint in winter or summer if your space is set up right.

9. What Areas Do You Paint First?

This is a small thing, but it makes a big difference:

  1. Ceilings
  2. Walls
  3. Trim and baseboards

That way, you’re painting from top to bottom. If you drip paint (and you will), it’s easier to fix.

10. Should I Paint My Bathroom Too?

Bathrooms are tricky because of the moisture. But yes, you can paint them—just use paint that’s made for high-moisture spots.

Also, if your bathroom tub or tiles look old, you don’t have to tear everything out.

You can try bathroom reglazing, which can save a lot of money.

In fact, if you’re in the area, there are companies that specialize in bathroom reglazing NY or NJ, and they can make your space look new without a full renovation.

11. What’s the Best Way to Paint My Home’s Interior?

interior painting questions

Every home is different, but here’s a simple plan:

  • Pick one room to start
  • Choose your colors and paint type
  • Do the prep work
  • Paint the ceilings first, then walls, then trim

If you’re not sure how to begin, hiring a pro might be worth it. You can check out this interior home painting service that works on all kinds of homes and gives great results.

12. Should I Paint Before or After a Remodel?

Always paint last. Here’s why:

  • Contractors move things around so walls can get scratched.
  • Tools and materials might scuff fresh paint.
  • Painting last gives the cleanest finish.

So, if you’re planning a bathroom remodel, wait until the contractor is done before opening that paint can.

13. What Should I Ask My Contractor?

Whether it’s a full bathroom contractor or just someone doing interior painting, here are questions to ask:

  • How many rooms have you painted?
  • Do you have pictures of past work?
  • Do you use primer and high-quality paint?
  • How long will the job take?
  • Do you clean up after?

Asking these upfront helps you feel confident and avoids surprises later.

If you live around, it’s smart to ask if the painter knows the rules and codes in your area, too.

Conclusion

When it comes to interior painting questions, there’s no such thing as a silly one.

Whether you’re painting a single wall or the whole house, asking ahead can save you stress, time, and money.

And remember—there’s no “perfect” color or paint brand. What matters is how you want your home to feel.

So trust yourself, prep well, and don’t be afraid to get help from a good contractor when needed.

Oh, and if you’re updating your space anyway, don’t forget about extras like bathroom reglazing, a bathroom remodel, or getting a local bathroom contractor NY to take a look.

Sometimes, one small change makes your whole home feel brand new.

Smart Ways to Handle Interior and Exterior Remodeling

interior and exterior remodeling

Interior and exterior remodeling can be overwhelming. This guide breaks it down so you can plan smart, avoid stress, and love your home again.

So, your house needs a little love. Maybe your kitchen feels too small. Maybe your roof is falling apart.

Or maybe you just want the place to feel more like you.

I’ve been in that same spot—looking around and thinking, “Something’s gotta change.”

That’s when you start talking about interior and exterior remodeling.

And no, you don’t have to be rich or have a Pinterest-worthy vision board to get started.

All you really need is a plan, a budget, and a little patience.

This post is going to help you figure out:

  • What areas to focus on first
  • How much it might cost
  • What kind of help you’ll need
  • How to handle the mess and stress

Let’s break it all down step by step.

1. Start with a Clear Plan

Before you start knocking down walls, take a minute to breathe and think things through.

Ask yourself:

  • What do I want to change?
  • What’s not working in my home right now?
  • What do I need vs. what do I want?

If your bathroom is leaking or your roof is giving up, those need to come first.

If you just want your kitchen to feel more open, that can wait if needed.

Whether it’s an interior remodel like updating your living room or an exterior remodel like replacing the roof or siding, make a list of what matters most to you.

Keep it simple, and don’t overthink it. You’re not building a castle—just trying to make your home better.

2. Set a Budget You Can Actually Stick To

I can’t say this enough—don’t skip this step.

Remodeling costs money. And if you don’t plan your budget, things can get out of control fast.

Here’s what I usually tell folks:

  • List out everything you want to do.
  • Look up rough prices for each part. Even ballpark numbers help.
  • Add 10–15% extra for those surprise costs (they always show up).
  • Stick to the list. If it’s not on the list, it’s not getting done.

Let’s say you want a kitchen remodel. On average, that can cost $10,000 or more, depending on what you want.

A Roof Replacement? Easily $7,000 to $12,000. Now, imagine doing both without a budget. Yikes.

But when you plan it out and focus on one area at a time, it’s doable.

3. Hire the Right People

Now, let’s talk about contractors.

Please don’t just hire the first person you find on the internet. I’ve heard way too many horror stories.

Take your time and find someone who listens to you, has good reviews, and knows what they’re doing.

If you’re in Maryland, I really recommend checking out this remodeler Maryland team.

They’re professional, reliable, and have been doing this for years. You won’t feel like you’re being sold to—and that matters.

Make sure the contractor is:

  • Licensed and insured
  • Willing to give you a written estimate
  • Clear about timelines and payments
  • Easy to talk to

You’re trusting this person with your home. It’s okay to ask questions or even say “no thanks” if something feels off.

4. Focus on the Most Important Areas

interior and exterior remodeling

Remodeling your whole house at once? That’s a recipe for stress. Instead, focus on one area at a time.

Here’s how I think about it:

Interior Remodel Options

  • Kitchen Remodel: This is usually the heart of the home. A few small updates—like new cabinets, lighting, or countertops—can make a big difference.
  • Basement Remodeling: That empty, dark basement? It can become a playroom, guest room, or home office. Doing a basement remodeling Maryland project is smart if you need extra space.
  • Bathroom Refresh: New tiles, a better sink, and brighter lights. Small things that make a bathroom feel fresh and clean.
  • Living Room Touch-Ups: New flooring or better storage can change the whole vibe of a room.

Exterior Remodel Options

  • Roof Replacement Maryland: If your roof is old, missing shingles, or leaking, don’t wait. A good roofing contractor Maryland can help you protect your home.
  • New Siding or Paint: This boosts your home’s look from the street and helps protect it from the weather.
  • Windows and Doors: Better ones save on energy bills and add security.
  • Landscaping: Even simple things like new plants or a walkway can boost curb appeal.

You don’t have to do it all at once. Pick one project and see it through before jumping to the next.

5. Think About the Long Term

I made this mistake once: I remodeled my living room, only to realize a year later that I needed it to double as a home office.

So, here’s my advice—think ahead.

  • Will your family grow in the next 3–5 years?
  • Do you plan to stay in this house for the long term?
  • Will you ever need wheelchair access or fewer stairs?

Design your remodel to fit your life now and later. A little planning now can save you thousands down the road.

Go for durable materials and smart upgrades, like energy-saving windows or low-maintenance floors.

It’s not just about how it looks—it’s how long it lasts.

6. Communication Is Everything

You don’t need to know how to install a toilet to manage a remodel. But you do need to talk clearly and often with your team.

Check in weekly. Ask questions. Speak up if something feels off.

Here’s a tip: Keep a simple notebook or shared Google Doc.

Write down what was done each week, what’s left, and any notes you have. That way, everyone stays on the same page.

A good remodeler will appreciate you being involved.

7. Get Ready for Some Chaos

Let’s be real. Remodeling is noisy. Dust gets everywhere. People come in and out of your house. And things almost always take longer than planned.

But you can prepare for it:

  • Clear the area being worked on. Cover furniture with sheets.
  • Make a backup plan for meals if you’re doing a kitchen remodel Maryland.
  • Move pets or kids to a quieter part of the house.
  • Take breaks when it gets too loud or messy.

It’s temporary chaos for long-term comfort. Keep your eye on the prize.

8. When It’s All Done, Take a Breath

interior and exterior remodeling

When the last hammer drops and the workers leave, take a moment to enjoy it.

That new roof? You don’t have to worry about leaks anymore. That updated kitchen? It finally works for you. That remodeled basement? It’s now your favorite spot in the house.

You did it.

Whether it was a small Interior RemodelMaryland project or a big Exterior Remodel, it’s all about making your home feel more like home again.

Remodeling isn’t just about looks. It’s about comfort, safety, and function. And yeah—it’s about pride, too. You stuck with it and made your space better.

Conclusion

If you’ve been putting off remodeling because it feels too big or too expensive, I get it.

But breaking it down into small, smart steps makes it doable.

  • Start with a plan.
  • Set a clear budget.
  • Hire the right help.
  • Focus on key areas like kitchen remodel, roof replacement, or basement remodeling.
  • Think long-term.
  • And don’t forget to breathe.

Your home should work for you, not the other way around. And with the right interior and exterior remodeling project, it totally can.

Can Outdoor Lighting Be Used Indoors?

can outdoor lighting be used indoors

Can outdoor lighting be used indoors?  Here’s what to know about safety, style, and setup when bringing outdoor lights indoors.

So here’s a question I get a lot—can outdoor lighting be used indoors?

Honestly, I used to think indoor and outdoor lights were totally different.

I mean, one’s made to be outside in the rain and snow, right?

However, after working with a landscaper in Metro Detroit who also handled lighting design, I realized something important: sometimes, outdoor lighting is actually better indoors.

Why?

It’s tougher, lasts longer, and can look really cool if you pick the right kind.

But of course, it’s not just a plug-it-in-and-go situation. You’ve gotta be careful with what lights you use and where you put them.

I’ll explain it plainly as we go on.

Why Would Anyone Use Outdoor Lights Inside?

Okay, first off, can outdoor lighting be used indoors? That isn’t a weird question.

It actually makes a lot of sense once you think about it.

Here’s why people are doing it more these days:

  • They’re strong: Outdoor lights are made to deal with sun, rain, snow, and bugs. That means they hold up really well indoors, too—especially in rooms like the bathroom or laundry area where it gets humid.
  • They’re stylish: A lot of outdoor lighting design options look really nice inside, too. Think black iron lanterns, rustic farmhouse lights, or even those little café string lights.
  • They give off great light: Many outdoor lights are brighter because they’re made to shine through the dark. That can be a plus in hallways, basements, or garages.
  • They’re more affordable than fancy indoor stuff sometimes: You’d be surprised how many people save money using outdoor fixtures inside.

So yeah, you’re not weird if this idea crossed your mind.

But Is It Safe?

Here’s the thing—just because you can do something doesn’t always mean you should do it without checking a few things.

When you’re thinking about whether outdoor lighting should be used indoors, the top concern is safety.

So, for safety reasons, here are some things you must do:

1. Look at the rating.

Check the label on the light. If it says UL listed for damp or dry locations, you’re good to go indoors.

Avoid ones that are only rated for wet outdoor use unless you’re putting it in a bathroom or near water.

2. Understand the wiring.

Outdoor lights sometimes run on low voltage. That means they might need a transformer to work inside safely.

If you don’t know what that is, no shame—just ask an electrician.

3. Avoid certain finishes.

Some outdoor lights have coatings to protect from weather that can smell weird or give off fumes inside.

Read the box or look it up online first.

4. Think about weight.

Outdoor lights can be bulky. Make sure your ceiling or wall can handle the size and weight.

Where Indoor Outdoor Lights Work Best

can outdoor lighting be used indoors

If you’re like me, you probably don’t want to waste time trying something that won’t look right.

So here’s where outdoor lighting can be used indoors, which makes the most sense.

  1. Bathroom: Use outdoor sconces or lantern-style lights here. They handle moisture well and add a cool, spa-like vibe.
  2. Kitchen: Above the sink or island, you can hang weatherproof pendant lights for a rustic or modern look.
  3. Hallways: Wall-mounted outdoor lighting is perfect for long or dark hallways. They’re built to light up big areas.
  4. Laundry Room or Basement: These spots get damp, and outdoor lights can handle it. Just make sure they’re sealed and don’t collect dust or lint.
  5. Entryways: If your front hallway is dim, using outdoor lighting near the door makes it brighter and more welcoming.
  6. Garage or Workshop: These lights are made to work hard. You can even use outdoor event lighting Metro Detroit style string lights to jazz it up.

Let’s Talk About Holiday Lights

Okay, here’s a fun one. A lot of people ask if they can bring holiday lights inside.

Of course, you can. But again, make sure they’re safe.

Some people go all out with permanent holiday lighting inside—think around stair rails or ceiling beams.

Others prefer temporary holiday lights for special occasions or just because it’s cozy.

Whatever your style is, you’re not alone. People love the warm glow that holiday lights give, even after December.

If you’re not sure what works best, take a look at what Lucent Landscape and Lighting offers.

They’ve got good ideas for using holiday lights both inside and outside.

And if you’re in Michigan, especially around Metro Detroit, you’ve probably already seen their work during the holidays.

Tips for Choosing the Right Outdoor Lights for Inside

can outdoor lighting be used indoors

If you’re still asking yourself, “Can outdoor lighting be used indoors without making my house look like a backyard shed?”

Here are some quick tips:

  • Keep it in style. Match your light to your room’s style. Industrial, farmhouse, modern—they all have different looks.
  • Don’t go too big. A patio light might overwhelm a small bedroom. Check the size before buying.
  • Use LED bulbs. They stay cool and save you money. You won’t regret it.
  • Think about brightness. Some outdoor lights are super bright. You might need a dimmer switch or a bulb with lower lumens.
  • Mount it right. Some outdoor lights are heavy or wired differently. Make sure you install it properly or get help.

Bonus Idea: Match With Your Outside

One last tip—if you’re doing both indoor and outdoor updates, it’s smart to match your styles.

If you have a stone patio with black lanterns, use similar lights inside your entryway.

This keeps everything looking connected and clean.

A good landscaper Metro Detroit team or landscaping pro can even help you figure that out.

Wrap-Up: So, Can Outdoor Lighting Be Used Indoors?

Let’s end where we started—with the big question. Can outdoor lighting be used indoors?

Yes. 100% yes. But do it smart.

Don’t just grab any light and stick it in your kitchen.

Check the ratings. Think about style. Know how it’s wired. And most of all—have fun with it.

Lighting isn’t just about seeing better. It’s about feeling better in your space.

And hey, if a light was built to survive a thunderstorm, it can probably handle your bathroom steam just fine.

Can Electricians Work on HVAC Systems? What You Need to Know Before You Call

can electrician work on hvac

Wondering can electrician work on HVAC systems in your home or business? Here’s what the law says, when it’s allowed, and when to call an HVAC pro instead.

When something goes wrong with your heating or cooling system, the first thought for many homeowners is to reach out to an electrician.

After all, both HVAC systems and electrical components involve the flow of energy, and electricians are known for their expertise in electrical wiring and circuitry.

But when it comes to HVAC systems, can electricians legally work on them? It turns out the answer isn’t as straightforward as it might seem.

Whether you’re dealing with a malfunctioning air conditioner, a faulty furnace, or a heating unit that just won’t power up, understanding who can and can’t work on your HVAC system is crucial to ensuring your system is repaired properly and safely.

In this article, we’ll explore whether electricians are qualified to handle HVAC systems, when they can step in, and when an HVAC professional is required.

We’ll also guide you through the key differences between the two roles and help you figure out who you should call for your next repair.

What is HVAC, and How Does It Work?

Before diving into the specifics, it’s important to have a clear understanding of what HVAC is.

HVAC stands for Heating, Ventilation, and Air Conditioning, and these systems are responsible for regulating the temperature, humidity, and air quality in your home or business.

They are designed to make indoor environments comfortable and healthy by ensuring that the right amount of fresh air is circulated while maintaining comfortable temperatures.

An HVAC system consists of several key components:

Heating: This is the part of the system that keeps your home warm during the colder months. It includes components like furnaces, heat pumps, boilers, and radiators, all of which rely on either gas or electricity to generate heat.

Ventilation: This refers to the way air circulates through your home or office. It includes the ductwork, exhaust fans, air filters, and ventilation shafts that help to remove stale air and replace it with fresh, clean air.

Air Conditioning: The air conditioning unit cools the air during hot months, ensuring you stay comfortable. It uses refrigerant, a cooling chemical, to absorb heat and lower temperatures. AC units are a key part of any HVAC system and require regular maintenance.

While HVAC systems involve both mechanical and electrical components, the area of expertise required to fix them can differ greatly depending on the type of issue.

can electrician work on hvac

So, Can Electricians Legally Work on HVAC Systems?

The legality of whether an electrician can work on an HVAC system depends on the specific problem you’re facing.

Electricians specialize in electrical systems, which means they can perform electrical work within the HVAC system, such as fixing wiring issues, repairing circuit boards, and replacing electrical components.

However, there are important limitations to what an electrician can do when it comes to HVAC repairs.

Here’s a breakdown of what electricians can and can’t handle when working on HVAC systems:

What Electricians Can Do

·         Wiring and Electrical Connections:

Electricians can handle any electrical work required for the HVAC system.

This includes installing, repairing, or replacing wiring and connections that power the HVAC unit.

For example, if your air conditioning system is not turning on, it could be due to an issue with the wiring or the electrical panel. An electrician can inspect the wiring and resolve any electrical problems.

·         Circuit Breakers and Safety Controls:

If the HVAC system is tripping circuit breakers or you suspect that there’s an issue with the electrical safety controls, an electrician can diagnose and resolve the problem.

They can also install or repair circuit breakers, ensuring your system is properly powered without any safety risks.

·         Thermostat Wiring:

Many HVAC systems are controlled by digital thermostats that require electrical wiring to function.

Electricians can install, repair, or replace thermostats, ensuring that they’re correctly wired and set up to control the HVAC system.

·         Replacing Fuses and Relays:

When fuses or relays blow out in the HVAC unit, an electrician can replace these components to restore the system’s power flow.

·         Air Handler Wiring:

If the HVAC system includes an air handler (which is a key part of both heating and cooling), electricians can repair or replace the electrical components of the handler, such as fans, motors, and electrical wiring.

What Electricians Cannot Do

Despite their skills with electrical systems, electricians cannot perform all tasks related to HVAC systems.

There are many mechanical and refrigerant-related issues that electricians are not licensed to handle. These tasks require specific HVAC training and certification.

Here are some examples of what an electrician cannot legally do:

·         Refrigerant Handling:

Electricians are not certified to handle refrigerants. These chemicals are a vital part of the air conditioning and cooling systems, and improperly handling them can lead to dangerous consequences.

Only HVAC technicians who are EPA-certified can legally work with refrigerants.

·         Gas Line Work:

If you have a gas-powered furnace, an electrician should not be working on the gas lines. Gas line work requires a licensed gas fitter or HVAC technician.

If you suspect a gas leak or need repairs to a gas-powered unit, it’s important to call in a certified professional who can safely deal with gas lines.

·         Air Conditioning and Heating Unit Repair:

If the core problem with your HVAC system is the air conditioning unit or heating unit itself (such as a broken compressor, malfunctioning blower motor, or evaporator coils), an HVAC technician is needed.

These components involve mechanical and technical skills that electricians do not possess.

·         Ductwork Issues:

If there is a blockage, leak, or damage in the ducts that carry the heated or cooled air, an HVAC technician will need to repair the ducts.

Electricians do not handle ductwork unless it’s directly related to electrical components like wiring or motors.

can electrician work on hvac

When Should You Call an Electrician for HVAC Work?

If you suspect your HVAC system is having electrical issues, an electrician is likely the right person to call.

Here are a few signs that you should reach out to an electrician:

  1. Your HVAC system isn’t turning on: If your unit won’t start, the issue might be electrical. An electrician can check the circuit board, wiring, and power supply to identify the problem.
  2. Blown fuses or tripped breakers: If your HVAC system is tripping breakers or blowing fuses regularly, an electrician can pinpoint the cause and replace the faulty parts.
  3. Malfunctioning thermostat: If your thermostat isn’t responding or controlling the system correctly, an electrician can fix the electrical issues related to its wiring.
  4. Electrical components are overheating: If your HVAC system’s electrical parts are overheating or causing safety concerns, call an electrician to handle the issue safely.

When Should You Call an HVAC Technician?

If your issue extends beyond the electrical components, it’s time to call in an HVAC technician.

Here are the types of issues that require an HVAC specialist:

  1. Refrigerant leaks: If your air conditioning system is no longer cooling properly or you notice a hissing sound, it could indicate a refrigerant leak. Only a certified HVAC technician can handle refrigerant repairs.
  2. Mechanical system failures: Problems with the compressor, coils, or fans should be handled by an HVAC professional who understands the mechanical workings of the system.
  3. Gas line issues: If your furnace runs on gas and you suspect there’s an issue with the gas supply, you need a licensed gas fitter or HVAC technician to safely handle the repairs.
  4. Ductwork and airflow problems: If you’re experiencing poor airflow or your ducts are damaged, it’s time to call an HVAC expert.

How to Find the Right Professional for HVAC Repairs

When dealing with HVAC issues, knowing who to call is half the battle.

Here are some tips for finding the right professional:

Look locally: Search for an “electrician Langwarrin” or “Sparkys Now” to find experts in your area. Local professionals will have experience with the specific needs of homes and businesses in the region.

Check reviews and ratings: Read online reviews from customers to ensure the professional has a strong reputation. Positive feedback will give you confidence in their skills.

Ask for credentials: Make sure the electrician or HVAC technician is licensed and certified to perform the required work. An HVAC technician should be EPA-certified, especially if they’re handling refrigerants.

Get multiple quotes: It’s always a good idea to get quotes from multiple professionals to compare pricing and services.

Conclusion: Know Who to Call for HVAC Repairs

While electricians can certainly handle electrical issues within an HVAC system, they are not qualified to address all of the mechanical and refrigerant-related problems that often occur.

By knowing when to call an electrician Langwarrin for electrical work and when to reach out to an HVAC technician for system repairs, you can save time and money while ensuring your system is properly repaired.

Understanding the roles of both professionals will help you make informed decisions when your HVAC system is on the fritz. Whether it’s electrical work or system maintenance, knowing who to trust is the key to keeping your home or business comfortable year-round.…